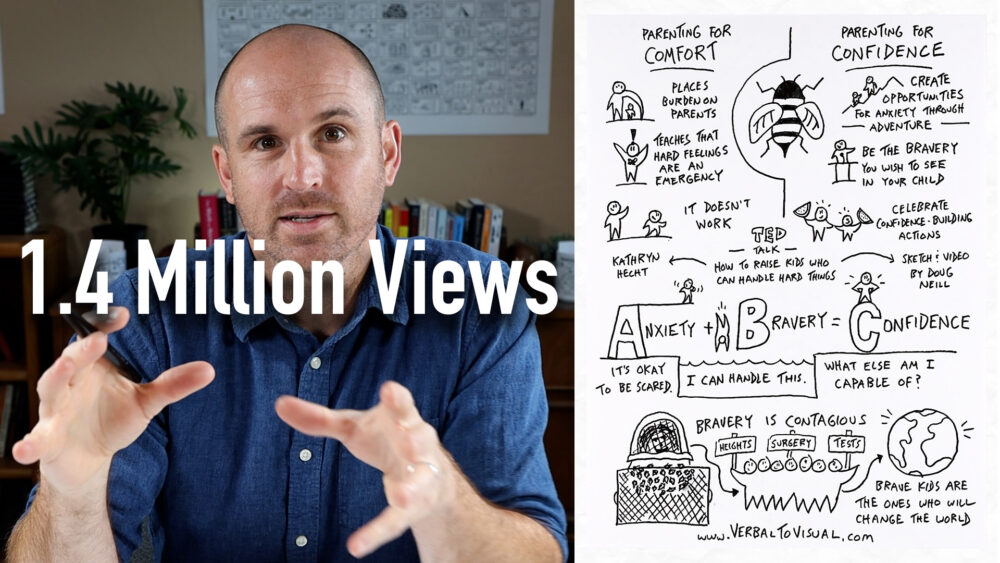
In the video above I walk through exactly how I created a sketched summary of Katherine Hecht’s TEDx talk, How to Raise Kids Who Can Handle Hard Things. I turned that same sketch into a short-form explainer video that has since picked up 1.4 million views across Instagram and TikTok.
For anyone learning or developing their visual thinking skills, I don’t just want to show the finished product. Here’s the full process, stage by stage.
Stage 1: First (Rough) Notes
Every project like this starts in my big notebook while I watch the talk. I never aim for polish here. I let myself be quick and messy in both the words and the sketches, because this stage is only about capturing the ideas as I’m first exposed to them. Drawing little icons as they come, grabbing key phrases, and giving structure to any list or flow the speaker describes.
I think of this as the brick road approach: no predetermined layout, just one idea at a time. Find an open chunk of space, fill it with some mix of words and imagery, then wait for the next idea and find a spot for it. The rectangles don’t have to match in size, orientation, or balance of words and pictures.
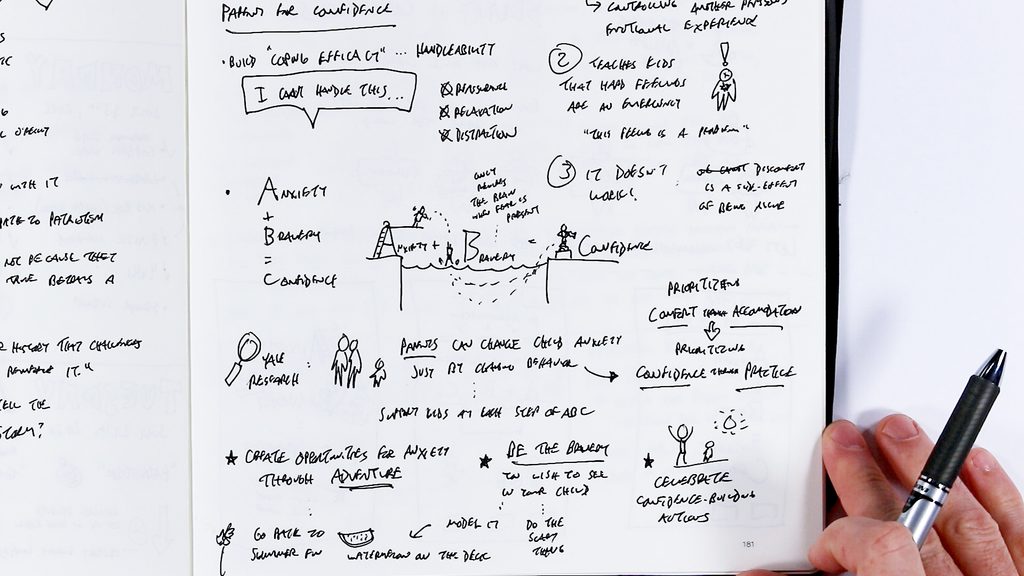
The big reason to move fast is energy. I have the most intrinsic motivation the moment I first encounter a good idea, so I try to get it into a sketch before the excitement fades. My advice: leverage that energy of the first read, listen, or watch. Don’t just think about what you might do, get to the sketch as soon as possible.
Worth noting: for a lot of purposes, this rough stage is the finish line. If you’re taking visual notes in a meeting, you probably won’t have time to polish them, and you usually won’t need to. If one framework or plan would help your team, you can clean up just that section and share it. Otherwise, rough notes are still a useful reference for you.
In this case, the talk itself gave me a lot to work with: the story of Sammy, a boy afraid of bees; the contrast between parenting for comfort and parenting for confidence; the equation anxiety + bravery = confidence; a helpful parallel structure of three problems with parenting for comfort and three ways parents can build confidence; Sammy’s “bravery ladder” and brave points; and the ideas that parents can lend their calm nervous system to their kids, that confidence comes from practice rather than praise or protection, and that bravery is contagious.
Stage 2: Thumbnail Sketches
I knew I wanted a vertically oriented short-form video, so next I made a series of quick thumbnail sketches to test possible layouts. I drew a series of small rectangles and filled each with a possible arrangement of sketches.
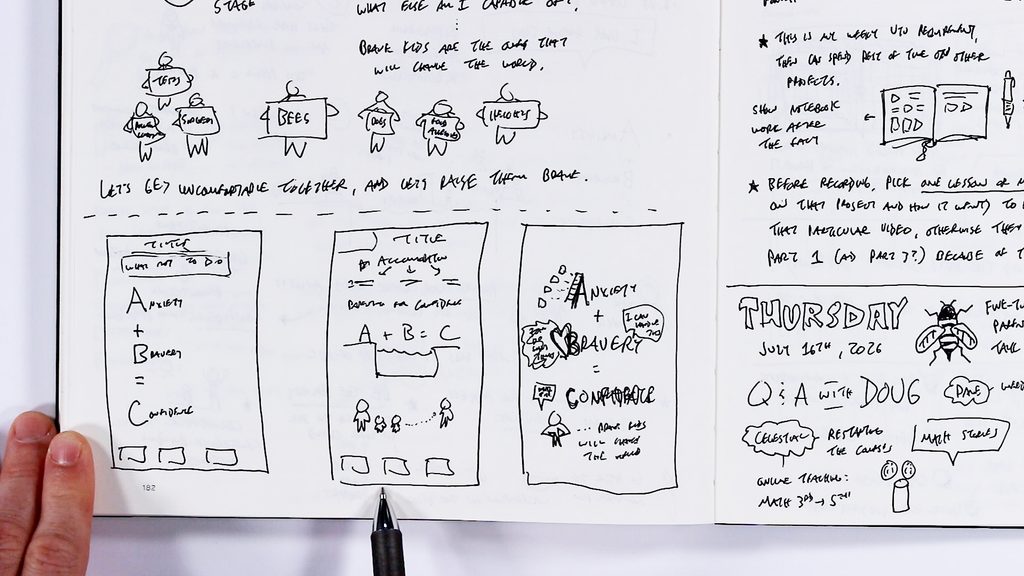
I knew from the start that the anxiety + bravery = confidence equation should play a central role — not the whole page, but the center of it, so I had room for the other ideas. It finally clicked on the fourth thumbnail: a bee up top dividing parenting for comfort (and its three problems) on the left from parenting for confidence (and its three supports) on the right, the equation in the middle, and Sammy’s journey along the bottom.
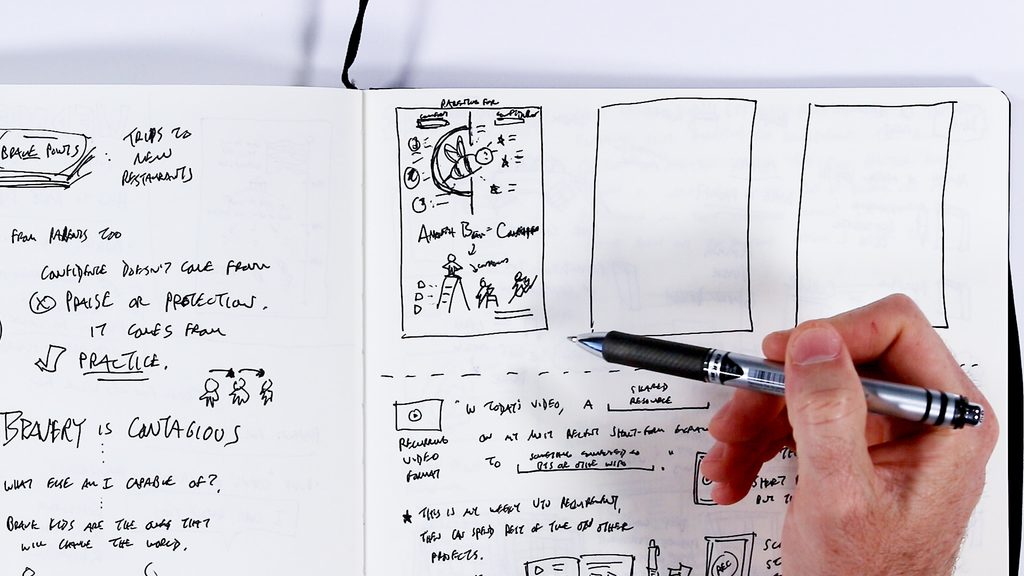
This whole stage is meant to be fast. I spend less time here than on my first-stage notes, because momentum is the name of the game. I’ll admit I sometimes stop as soon as I land on one I like, leaving a few boxes blank. Forcing out a few more ideas probably wouldn’t hurt, but I like moving quickly, knowing I can always come back and brainstorm if the polished version isn’t working.
Stage 3: A Clean Digital Draft
With a thumbnail I liked, I moved to my iPad and the Concepts app to sketch everything cleanly and fine-tune the layout. I set up a frame at 9×12 inches, the exact size of the paper I’d eventually draw on.
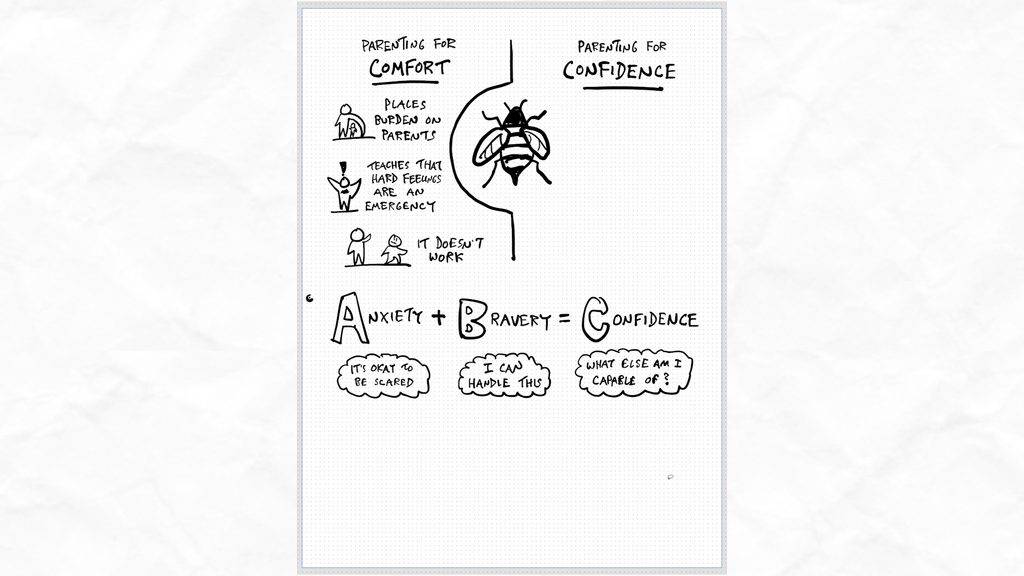
A few choices from this stage:
- The bee came first. I referenced a Google image search and skipped the cartoonish version in favor of a more accurate bee specimen, which fit the tone of Sammy’s story.
- I curved the dividing line around the bee instead of running a straight T-chart line down the middle. Curving it to enclose the “parenting for comfort” side communicated the instinct to protect kids from everything, while leaving no hard barrier on the “parenting for confidence” side reflected exposing kids to some scary things.
- Consistent visual style. Numbered lists got small icons, and I drew people in a consistent “star people” style that’s been my go-to lately.
- Integrating text into the visual. I tucked the three phrases tied to each stage of the equation (“it’s okay to be scared,” “I can handle this,” “what else am I capable of?”) into white space I’d already created. That kind of spatial efficiency, when everything fits together cleanly, is exactly what gets me excited about this work.
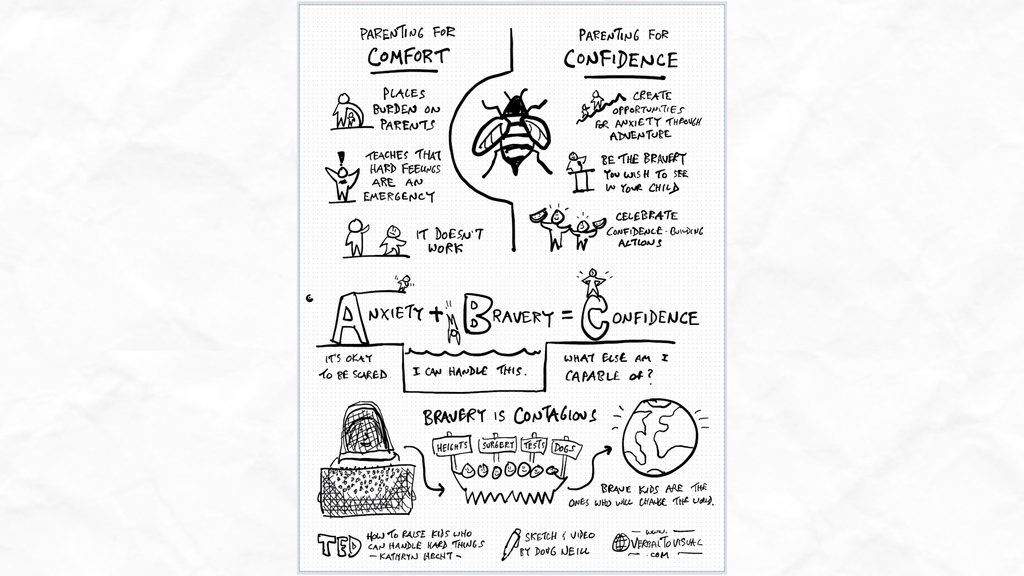
The bottom section highlighted more of Sammy’s journey (donning a beekeeper suit, interacting with a whole hive) and connected it to the idea that bravery is contagious, closing with source details, my signature, and website.
One deliberate habit: I never zoomed in. I’m making this draft so I can redraw it by hand, and I can’t zoom in on paper. Avoiding the zoom also keeps me from chasing tiny details that don’t matter. (The caveat: if you’re working fully digitally and want a clean digital export, zooming in to add detail is totally fine.)
Stage 4: The Final Sketch on Paper
I exported an image of the draft to keep on my computer screen as a reference, then turned on my overhead camera to draw the real thing. I use 9×12 drawing paper, secured with double-sided tape so it won’t shift, and I rotate the camera to fit the frame. For recording I switch to a Pentel Sign Pen for bolder marks, rather than the Pentel EnerGel I use for first-stage notes.
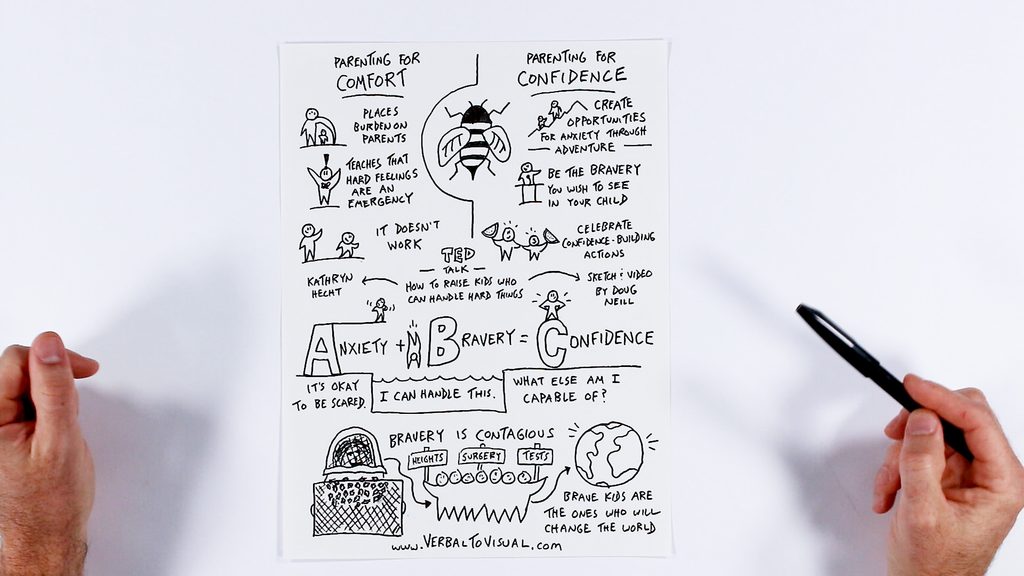
A few small differences from the digital draft always creep in, mostly in spacing and where the sourcing lands, and that freehand flexibility is important, because you can’t get everything into exactly the right size and space. Finishing this recording is a big milestone: it’s the only stage where a significant mistake would mean starting over.
Stage 5: Recording the Narration
I don’t script the narration. I pull up the video of the finished sketch so I can follow the order in which the words and images appeared, then talk my way through each section, mistakes, rephrasings, and all. That can take 20 to 30 minutes, which edits down to a tight 2 to 3 minutes once the pauses and stumbles are cut out.
Stage 6: Editing in Adobe Premiere Pro
This is where it all comes together: the spoken narration synced with sped-up footage of the sketch. Then I add captions in the space above the sketch. With long-form horizontal videos there isn’t much expectation for on-screen captions, but with vertical short-form video there is. A lot of people watch on TikTok, Reels, or Shorts in public with the sound off. Premiere generates the captions from my narration; I fix the errors and fine-tune the timing and spacing, which is the time-consuming part. It’s also the last stage, so getting through it means I can finally export and share.
The Results (and One Lesson)
This one resonated: roughly a million views on Instagram and over 400,000 on TikTok. I wasn’t too surprised. There are a lot of parents out there (I’m one of them), the tips are genuinely helpful and actionable, and Katherine’s storytelling is strong, from Sammy’s story to the comfort-versus-confidence structure to the formula itself.
My one regret: I wish I’d noted on the sketch, or mentioned in the video, that the visual structure came from the talk itself. I left it off because of page-size and narration-time constraints, so I shared the source in the comments on each platform and encouraged folks to watch Katherine’s talk for themselves. If you haven’t seen it, I encourage you to check it out:
Dive Deeper
If you’re ready to take your own visual thinking skills to the next level, then check out our library of online courses:

I’d recommend An Introduction to Visual Note-Taking and Make Models as good starting points. And if you’d like to learn more about the video creation process, then check out How to Make Sketchnote Videos.
Best of luck on your next visual thinking project!
Cheers,
-Doug